How To Get Autotune On Garageband Mac
- Autotune Plugin Garageband
- How To Get Autotune On Garageband
- How To Autotune In Garageband
- How To Auto Tune On Garage Band Mac
- How To Get Autotune On Garageband Mac Free
Incredible music.
In the key of easy.
Apr 17, 2018 How to sound like lil tecca on iPhone (garage band) How to record rap on iphone - Duration: 4:36. Desmo 269 19,683 views. In this video tutorial, viewers learn how to create a auto-tune, T-Pain effect in the program, Garage Band. This task is easy, fast and simple to do. Begin by opening the program and import the vocal audio. In the time-line under Advanced, increase the Enhance Tuning to 100 and check Limit to Key. Then open the Track Info Pane and go to Details. Jul 18, 2019 Also Read – Best Beat Making Software for Windows & MAC GarageBand Enhance Tuning. This Autotune software for Mac especially is not available for Windows as of now. May be expected soon in the near future. There is a particular section in this software named, ‘Audio Region’. This section can be seen on the left side of the screen. Sep 26, 2018 Just a small basic tutorial on the Autotune in Garageband for the upcoming artists. This is my first video so please like and subscribe thanks! Also if there is any bad quality I would like to.
GarageBand is a fully equipped music creation studio inside your Mac — with a complete sound library that includes instruments, presets for guitar and voice, and an incredible selection of session drummers and percussionists. With Touch Bar features for MacBook Pro and an intuitive, modern design, it’s easy to learn, play, record, create and share your hits worldwide. Now you’re ready to make music like a pro.
Start making professional-sounding music straight away. Plug in your guitar or mic and choose from a jaw‑dropping array of realistic amps and effects. You can even create astonishingly human‑sounding drum tracks
and become inspired by thousands of loops
from popular genres like EDM, Hip-Hop, Indie
and more.
More sounds, more inspiration.
Plug in your USB keyboard and dive into the completely inspiring and expanded Sound Library, featuring electronic‑based music styles like EDM and Hip-Hop. The built‑in set of instruments and loops gives you plenty of creative freedom.
The Touch Bar takes centre stage.
The Touch Bar on MacBook Pro puts a range of instruments at your fingertips. Use Performance view to turn the Touch Bar into drum pads or a one-octave keyboard for playing and recording.
Plug it in. Tear it up.
Plug in your guitar and choose from a van-load of amps, cabinets and stompboxes.
Design your dream bass rig.
Customise your bass tone just the way you want it. Mix and match vintage or modern amps and speaker cabinets. You can even choose and position different microphones to create your
signature sound.
Drumroll please.
GarageBand features Drummer, a virtual session drummer that takes your direction and plays along with your song. Choose from 28 drummers and three percussionists in six genres.
Shape your sound. Quickly and easily.
Whenever you’re using a software instrument, amp or effect, Smart Controls appear with the perfect set of knobs, buttons and sliders. So you can shape your sound quickly with onscreen controls or by using the Touch Bar on MacBook Pro.
Look, Mum — no wires.
You can wirelessly control GarageBand from your iPad with the Logic Remote app. Play any software instrument, shape your sound with Smart Controls, and even hit Stop, Start and Record from across the room.
Jam with drummers of every style.
Drummer, the virtual session player created using the industry’s top session drummers and recording engineers, features 28 beat‑making drummers and three percussionists. From EDM, Dubstep and Hip-Hop to Latin, Metal and Blues, whatever beat your song needs, there’s an incredible selection of musicians to play it.
Each drummer has a signature kit that lets you produce a variety of groove and fill combinations. Use the intuitive controls to enable and disable individual sounds while you create a beat with kick, snare, cymbals and all the cowbell you want. If you need a little inspiration, Drummer Loops gives you a diverse collection of prerecorded acoustic and electronic loops that can be easily customised and added to your song.
Audition a drummer for a taste of their distinct style.
Powerful synths with shape‑shifting controls.
Get creative with 100 synth sounds inspired by EDM and Hip-Hop. Every synth features the Transform Pad Smart Control, so you can morph and tweak sounds to your liking.
Sweeping Arp
Droplets
Bright Punchy Synth
Pumping Synth Waves
Epic Hook Synth
Learn to play
Welcome to the school of rock. And blues. And classical.
Get started with a great collection of built-in lessons for piano and guitar. Or learn some Multi‑Platinum hits from the actual artists who recorded them. You can even get instant feedback on your playing to help hone your skills.
Take your skills to the next level. From any level.
Choose from 40 different genre-based lessons, including classical, blues, rock and pop. Video
demos and animated instruments keep things fun and easy to follow.
Teachers with advanced degrees in making hits.
Learn your favourite songs on guitar or piano with a little help from the original recording artists themselves. Who better to show you how it’s done?
Instant feedback.
Play along with any lesson and GarageBand will listen in real time and tell you how you’re doing, note for note. Track your progress, beat your best scores and improve your skills.
Lots of helpful recording and editing features make GarageBand as powerful as it is easy to use. Edit your performances down to the note and decibel. Fix rhythm issues with a click. Finesse your sound with audio effect plug‑ins. And finish your track like a pro, with effects such as compression and visual EQ.
Go from start to finish. And then some.
Create and mix up to 255 audio tracks. Easily name and reorder your song sections to find the best structure. Then polish it off with all the essentials, including reverb, visual EQ, volume levels and stereo panning.
Take your best take.
Record as many takes as you like. You can even loop a section and play several passes in a row. GarageBand saves them all in a multi‑take region, so it’s easy to pick the winners.
Your timing is perfect. Even when it isn’t.
Played a few notes out of time? Simply use Flex Time to drag them into place. You can also select one track as your Groove Track and make the others fall in line for a really tight rhythm.
Polish your performance.
Capture your changes in real time by adjusting any of your software instruments’ Smart Controls while recording a performance. You can also fine‑tune your music later in the Piano Roll Editor.
Touch Bar. A whole track at your fingertips.
The Touch Bar on MacBook Pro lets you quickly move around a project by dragging your finger across a visual overview of the track.
Wherever you are, iCloud makes it easy to work on a GarageBand song. You can add tracks to your GarageBand for Mac song using your iPhone or iPad when you’re on the road. Or when inspiration strikes, you can start sketching a new song idea on your iOS device, then import it to your Mac to take it even further.
GarageBand for iOS
Play, record, arrange and mix — wherever you go.
GarageBand for Mac
Your personal music creation studio.
Logic Remote
A companion app for Logic Pro X.
Before we begin, I just have to be completely honest and say I’m not an expert in the use of pitch correction or auto-tune, because I rarely use them, however, I recently had to, so I figured I’d share what I learned.
In today’s tutorial, I’m going to show you how I recently used pitch correction in the manner consistent (at least in sound) with Travis Scott and other hip-hop artists of the day.
Pitch-correction is almost always used in the recording process, and every artist uses it, from metal bands, rock bands, pop singers, and so on and so forth.
Similar to ghost-writers and professional producers/writers working on your favorite artist’s latest record, it’s just a part of the business and it’s a part of how the game is played at a high level.
Virtual instrument users can now experience the joy of the hardware synth workflow and hardware synth users can fully expand their capabilities into the vast sonic world of Omnisphere!List of Supported Hardware. 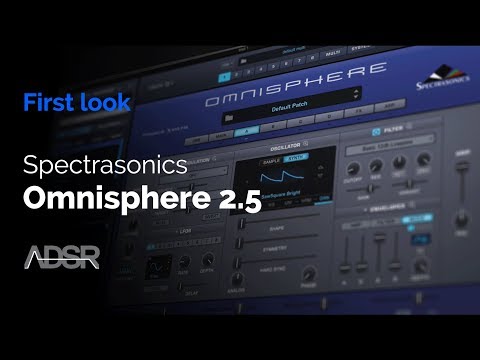 This remarkable innovation transforms over 65 well-known hardware synthesizers into extensive hands-on controllers that unlock Omnisphere’s newly expanded synthesis capabilities. New Hardware Sound LibraryOmnisphere 2.6 includes a stunning new “Hardware Library” with over 1,600 new patches created by and the renowned Spectrasonics Sound Development team. Simply put, this ground-breaking feature makes using Omnisphere feel just like using a hardware synth! By bridging the physical experience gap between software and hardware, users gain intuitive control of Omnisphere by using the familiar layout of their supported hardware synth.
Without further ado…
How To Use Auto-Tune (Pitch Correction) In Garageband.
First things first.
You need to know the key signature of the music. This should be the first step you make.
If you want to know the key signature of the song, I just find the tonal center of the music, and then I play the notes of that scale.
For instance, when I jammed along to Dave East’s “Type Of Time” recently, I knew it was in the key of C Minor (relative major: Eb Major).
I figured it out, just by searching around on my guitar for the note on which the entire song is built, and then I played the natural minor scale up from the root note, carefully listening for each note to hear any dissonances.
If you don’t know anything about major or minor scales, I suggest checking out MusicTheory.net, as they have great tutorials for beginners to music theory. Also, Mark Sarnecki’s book, which I wrote about here.
You can also use the tool, TuneBat.com.
TuneBat is a pretty good resource for quickly finding the key signature of a song. They have quite a bit in there.
Personally, I like figuring it out for myself that way I don’t have to depend on the software, however, if you’re only a music producer rather than a musician, sight-reading or improvising skills really aren’t that important.
Also, u
1) Open a new project/already existing project.
2) Hit (Command + Option + A) to bring up an Audio track.

3) You’ll see down in the Smart Controls the way the Audio looks in wave format, in addition to a few different settings including, “Limit to Key,” and “Enable Flex.”
4) From here, what you want to do is hit the “Enable Flex” and “Limit Key” check-boxes to ensure that when you record some vocals or other music, the pitch correction tool will come in keep everything in the key.
5) At this point, I’m sure you’re already familiar with the key signature option at the top center of the DAW, but for the sake of clarification, I’ll speak of it anyway.
Just go up to the top-center where it displays the beats per minute, measure, time signature, and the tempo. You can adjust the key signature from there.
6) Now, if you want to make auto-tune work in the style of, say, for example, T-Pain, you’re going to need to know the key signature of the track in which to sing.
7) Depending on how much auto-tune you want to use, you can adjust the pitch correction on a 1-100 scale within the Smart Controls.
If you put it all the way to 100, that’s obviously the most amount of pitch-correction you can use.
8) The next step is to begin recording your vocals, and then listen to how the pitch correction tool has changed the way your vocals sound.
In the Instagram post below, you can see what it sounds like without pitch correction and with the pitch-correction all the way up to 100.
The first thing that you hear is the out-of-key version of “Stargazing” from Travis Scott.
You’ll notice when I say the word, “Stargazing,” it sounds out of key. But then after I adjust the pitch the correction to 100 it starts to sound good.
In conclusion, the steps I laid out above is how you pitch-correct a vocal track. However, if you want to use auto-tune as a creative tool in the style of Travis Scott, then there are additional details.
It’s worth mentioning that between 65 and 75 is the best range for the pitch correction tool if you’re just trying to correct those imperfections.
Also, it’s best to give the best singing performance possible, because the pitch correction tool works at its most optimal when the notes are only slightly off.
If you just sing wildly out of tune, the benefit of using the pitch correction software is lost. You can try it for yourself some time to see what I mean.
How To Use Auto-Tune Like Travis Scott
For this, it’s pretty much the same thing as the steps listed above, but we have to add a few more effects, including delay, reverb, and a bit of compression as well, actually, probably a lot.
For the sake of clarity, I’ll run through these steps once again.
1) Bring up your audio track using the (Command + Option + A) function.
2) Click on the Audio Region.
3) Click on Track.
4) Check both boxes, “Limit to Key,” as well as “Enable Flex.”
5) Hit Record on your Audio Track, and then record yourself singing whatever it is that you want to sing.
If I were you, I would make sure that you have the “Feedback Protection” box clicked, just in case.
Also, if you’re going to use your computer’s built-in microphone, you’ll have to plug headphones in due to the fact the microphone and built-in speakers are too close to each other.
If you plan on actually making legitimate vocals, obviously, it’d be a much better option to use a good microphone. From what I understand, Shure is kind of like the industry standard.

Moving on…
6) Turn the pitch-correction all the way up to 100 that way it’s working as much as possible.
7) Go into your Plug-ins, and select the options, Compressor, Platinum Verb within the Reverb options, the Stereo Delay, as well as the Channel EQ
8) First, go into your EQ, and EQ the audio track so it looks like the image I’ve laid out below.
You can see that the Lows have been boosted considerably, as well as the highs, and then the mids are cut out almost completely.
9) Then, go into your Compressor and set it at the settings you can see below in the image.
10) For the Platinum Verb, I just keep it at the default setting.
11) Now that you have your final track, you can see that it kind of has that Washed out with Reverb/Robot style which is Travis Scott’s style. I don’t mean that derisively, those are just the mannerisms that come to mind.
12) For the next step, you want to copy and paste your audio track into two new duplicate tracks, however, you’ll pan the one to the left and one to the right using the pan buttons that look like this.
13) After this, make sure you turn off the Delay off the two duplicate tracks because otherwise, there will be too much of it.
Effects like Reverb and Delay kind of add up on top of each other, so make sure to not over-use these features.
How To Use Auto-Tune (Pitch Correction) In iOS
Setting up pitch correction and auto-tune in iOS isn’t much different from how you’d do it on the Mac.
Without further ado.
1) The first thing you want to do, is hit the option, “+” on the top right-hand side of the screen when you first open up Garageband iOS.
2) Select the option, “Audio Recorder.” 2
3) Now, you’ll come to a little dial in the center of the screen that kind of looks like a children’s toy. Choose the Golden Microphone option titled, “Extreme Tuning.”
4) From there, go into the drop-down menu on the top-left hand of the screen and click on the “Extreme Tuning” icon.
Autotune Plugin Garageband
5) Then, click on the setting that says, “Vocals.”
6) Choose the option “Lead Vocals” from there.
7) We now have five dials from which to choose, Tone, Pitch Control, Compressor, Drive, and Vocal Hall.
6) Hit the dials (that looks like a Gear) of the top-right hand side of the screen, and then click on “Track Controls,” which
7) Add a little bit of Reverb and then Delay.
8) You can adjust the compressor up or down, depending on how much you want to equalize the sound.
9) From here, as I mentioned in the tutorial above, you need to figure out the key signature of your song. Considering the fact it’s the song you’ve likely written, you’ll know what the key is.
10) If you need to adjust the Key Signature, click on the icon that looks a gear, then choose “Song Settings.” From there, you can see where it gives Tempo and Key Signature options.
If you’re using someone else’s song, try TuneBat.com.
***Having the proper key signature set up is an important detail because it gives the pitch correction software a standard by which to measure and adjust.
How To Get Autotune On Garageband
If you have the wrong Key Signature, auto-tune won’t work properly because the tool will adjust the wrong notes to the wrong pitch.
How To Autotune In Garageband
***There’s also an Application that you can download called, “Voloco,” which acts as a harmonizer and pitch correction tool. I don’t think it’s that necessary frankly, but you can try that out.
You can refer to the Instagram post above if you want to hear the final product.
As I’ve mentioned before, probably the most important things to remember when using auto-tune and pitch correction are as follows:
- Adjust the amount of correction from 0 to 100
- Use Delay and Reverb
- Sing on key to really maximize the utility of pitch correction software.
And that’s pretty much it.
How To Auto Tune On Garage Band Mac
Anyway, I hope this helped you out. Make sure to share it on your social media if you enjoyed it.
How To Get Autotune On Garageband Mac Free
Until next time.